

Skeletal Animation
Animations loadeds and playable in-engine
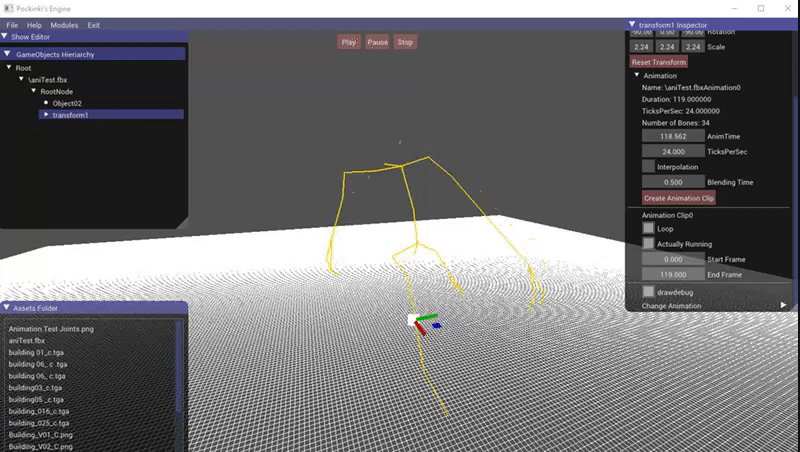
Running the Animation
After reading the animation with Assimp and saving and loading it in our own file format, we start to run the animations.
To run an animation, we'll have a timer that will keep the actual time of the animation, each frame, we will add to this timer the delta time between frames.
Once we have this timer running, we will iterate each bone in our list of bones to take the last keyframe of this bone with a time equal or bigger than the animation time.
Doing that for every position and rotation in the skeleton will make our character to move, but not as smooth as we want him to move.
To give him the smoothness we want him to have, we will use interpolations between the keyframes of each bones so we can will have movement between these key frames.
For the interpolation, we use a ratio between 0 and 1 based on the time of the initial key frame we want to interpolate and the next frame of the one we picked as the actual one.
for the interpolation with positions we used Lerp and for the rotation we used Slerp because gives a better result.
Doing interpolations you will see how your animations looks way more smooth.
Animation Blending
Now animations can be played, but changing between animations will do the character to teleport to the initial position of the desired animation and then run it normally.
We can't allow this to happen, so we implemented animation blending.
To blend animations we will store two animation clip's pointers, the first one is the clip that we're changing to, we will call it ActualClip.
The clip we we're running before selecting a new one will be called LastClip.
we will run both animations at the same time, and we will recap their actual position for position and rotation, once we have that, we will interpolate the position of the LastClip with the position of the ActualClip with a ratio based on the blending time we selected.
The blending ratio (between 0 and 1), is based on the time the blend has been running divided by the blending time.
once the blend running time is equal to the blending time que selected we will just keep playing the ActualClip animation normally.
Animation Blending
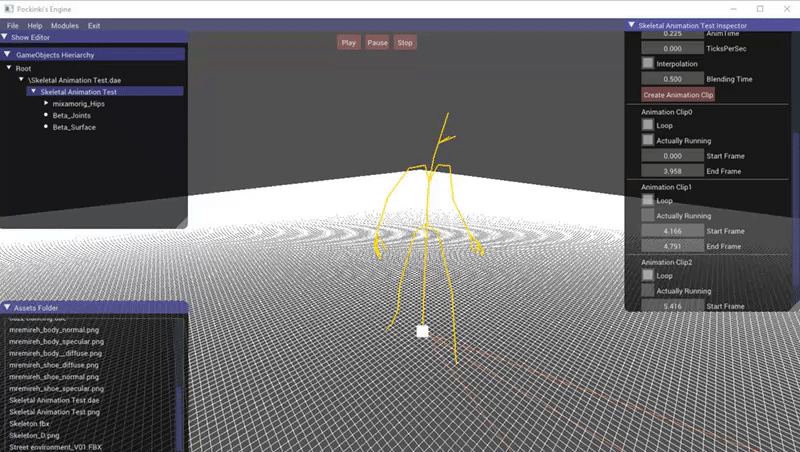
Animation Clips
Assimps saves your animations in one file with all the key frames of each bone togheter, so we needed to create clips to separate the animations.
In the animation clips we store the name of the animation clip, two floats to save the start time of the clip and it's end time, a loop boolean that will repeat the animation when it has finished if it's activated and another boolean that we called "Actually running" to set that animation to the current running animation.
Animation Blending
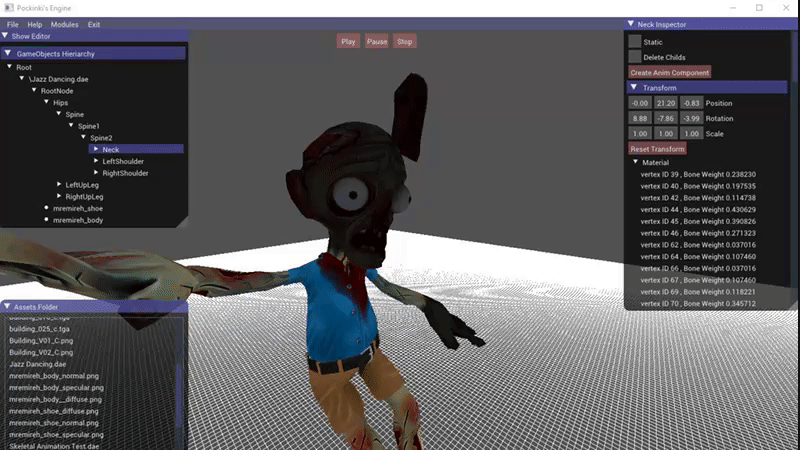
Skinning
At this moment, we can play and blend through animations without any problem, the last thing we have to do is to match the skeleton we animate with the mesh through a skinning to have our character moving.
Assimp gives us the name of every bone the mesh has, in each bone, we have a list of every vertex affected by this bone and the weight, a float between 0 and 1 that affects how much is the vertex affected by the bone. Every bone also has a offset matrix that holds it's position in the local space of the mesh.
To make the skinning we added a component Bone in every bone of the skeleton that holds a pointer of a "MeshBone".
The MeshBone holds a list with the vertexs affecteds by that bone and the weight that were told before.
Now we have every bone setted up, we start iterating the skeleton and for every bone we will follow the next steps:
·Get the global transform of the bone.
·Get the local transform of the mesh the bone will affect to, invert its local matrix and multiply it for the global transform of the bone.
·multiply the result matrix for the offset matrix of the bone.
Once we have the result matrix of the bone, we will start iterating every vertex affected by the bone.
We will transform the original vertex position of the mesh using the result matrix.
That new position will be multiplied for the weight of the vertex and added to the original vertex position.
As we iterate every bone, the skinning will be completing itself and we will see the results.

Following this steps we implemented skeletal animation in our engine. Next step is to make a game using the engine or make funny stuff with animations ^^.